1K Blog Marathon: Day 37
UiPath is a great tool for automating your online tasks. Whether you’re a business owner, a newbie programmer, a tech wizard, or a curbside coder like me, it’s very easy to grasp. Here let me take you to a quick journey in getting started with UiPath. Let’s get our hands dirty!
Related posts:
Getting Started with UiPath: Part 2
Getting Started with UiPath: Part 3
What is UiPath: RPA in Layman’s Term
Installation
A. Hardware Requirements
| Minimum | Recommended | ||
|---|---|---|---|
| CPU | 2 x 1.8GHz 32-bit (x86) | 4 x 2.4GHz 64-bit (x64) | |
| RAM | 4 GB | 8 GB |
B. Software Requirements
| Operating System | Windows 7 | Update KB 2533623 (required by OCR and Computer Vision activities) |
| Windows 7 N | ||
| Windows 7 SP1 | Update for Universal C Runtime Microsoft Visual C++ 2015 Redistributable Update 3 x86 version (required for GIT source control functionality) | |
| Windows 8.1 | Microsoft Visual C++ 2015 Redistributable Update 3 x86 version (required for GIT source control functionality) Microsoft Visual C++ Redistributable for Visual Studio 2015, 2017 and 2019 (required for SVN source control) | |
| Windows 8.1 N | ||
| Windows 10 | Microsoft Visual C++ Redistributable for Visual Studio 2015, 2017 and 2019 (required for SVN source control) | |
| Windows 10 N | ||
| Windows Server 2012 R2 | ||
| Windows Server 2016 | ||
| Windows Server 2019 | ||
| Citrix environments | XenApp v6.5 or greater | |
| XenDesktop v7.0 or greater | ||
| .NET Framework | Version 4.6.1 or greater | If your machine runs Windows OS in a language other than English, install the corresponding language pack for the .Net framework version you are using. This is required for running Studio in any of the available languages. The .Net framework and related language pack version must correspond, and any conflicting .Net framework versions installed on the machine should be removed. |
| Web Browsers (for browser automation) | Internet Explorer v8.0 or greater | |
| Google Chrome version 64 or greater | Automated with the extension for Chrome or the Webdriver protocol. | |
| Mozilla Firefox version 52.0 or greater | Automated with the extension for Firefox or the Webdriver protocol. | |
| Microsoft Edge on Windows 10 version 1803 or greater | Automated with the extension for Edge. | |
| Microsoft Office (for projects created in the StudioX profile) | Office: 2010 | For Office 2010, you must also install Visual Studio 2010 Tools for Office Runtime version 10.0.50325 or greater. |
| Office: 2013 | ||
| Office: 2016 | ||
| Office: 2019 | ||
| Office 365 |
C. Process
1. To install UiPath Community Edition, you must first create a free account in UiPath website. Click here to create your account.
2. Once you have created an account, click “Download Studio/StudioX”.

3. Click on the UiPathStudioSetup.exe. There is no installation instruction needed.
4. You will be welcomed by this window!

Environment
Create your first UiPath Bot
This is the UI of the UiPath (sounds redundant right?)
1. To create your new project, click “Process” on the top right side.

2. You can set your Project Name, Path Directory and Description in the popup dialog. You can also select the programming language you prefer. For this tutorial, just leave the default settings and click Create.

3. This is the actual Platform where you will create your first UiPath Bot.

4. Now, select “Activities” from the left tab. Now you can see the available Activities (Objects) that you can use. This is similar to a Toolbox Window in Visual Basic.

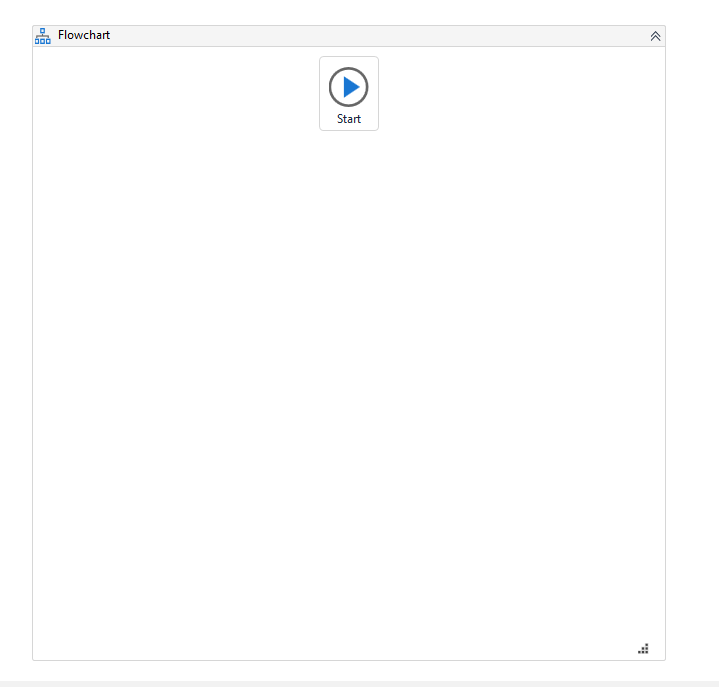
5. On the search box, type “Flowchart”. This is a very easy way to get started with creating bot, and by using Flowchart you can have an overview of the whole program.

Add this Activity by Double-clicking it, or drag and drop it at the center of the Main. This will give you this activity. A simple Flowchart.
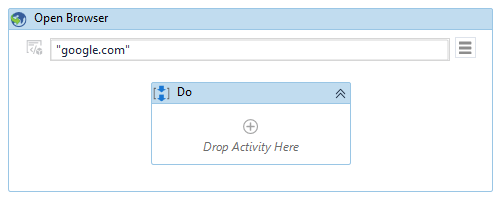
6. Again, on the Search activities box, type “browser”. Select and Drag “Open Browser” from the result.

Note: Make sure that the “Start” and the “Open Browser” Activity is connected by an arrow.

As the name suggest, this activity can open a browser. Go on the Properties Panel (right panel) and search for BrowserType, change it’s value to “Chrome”. This way, we tell the Open Browser activity to open a Chrome browser.
7. Double-click to view inside the activity. Type “google.com” to the url box, so that when the bot opens Chrome, it will go to google.com page.
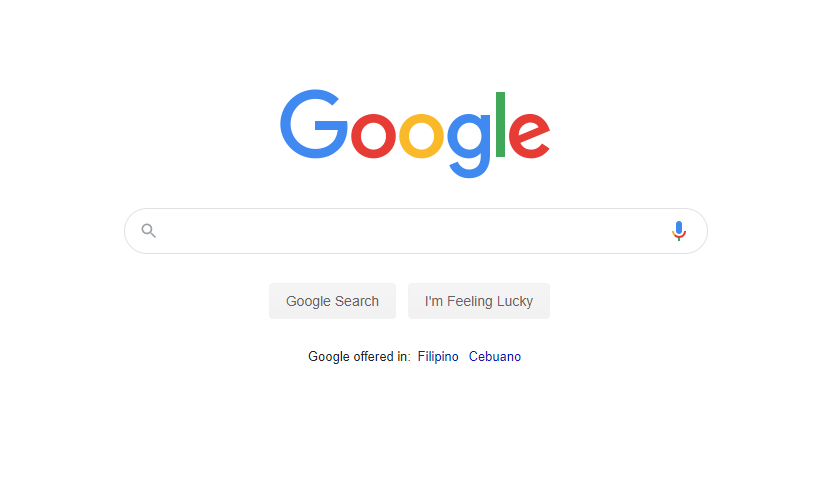
8. Try to run this program by clicking the start button (blue arrow) or pressing F5 on the keyboard. You can see that the bot will open Google Chrome.
Tomorrow let’s talk about how to search on Google Chrome, extract data and manipulate it in an Excel file. I will also teach you how to install UiPath Extension for Chrome. Thank you folks!
“And that’s one blog, stay hungry!”
Just try new things. Don’t be afraid. Step out of your comfort zones and soar, all right?
Michelle Obama


Leave a comment